schedule a webinar

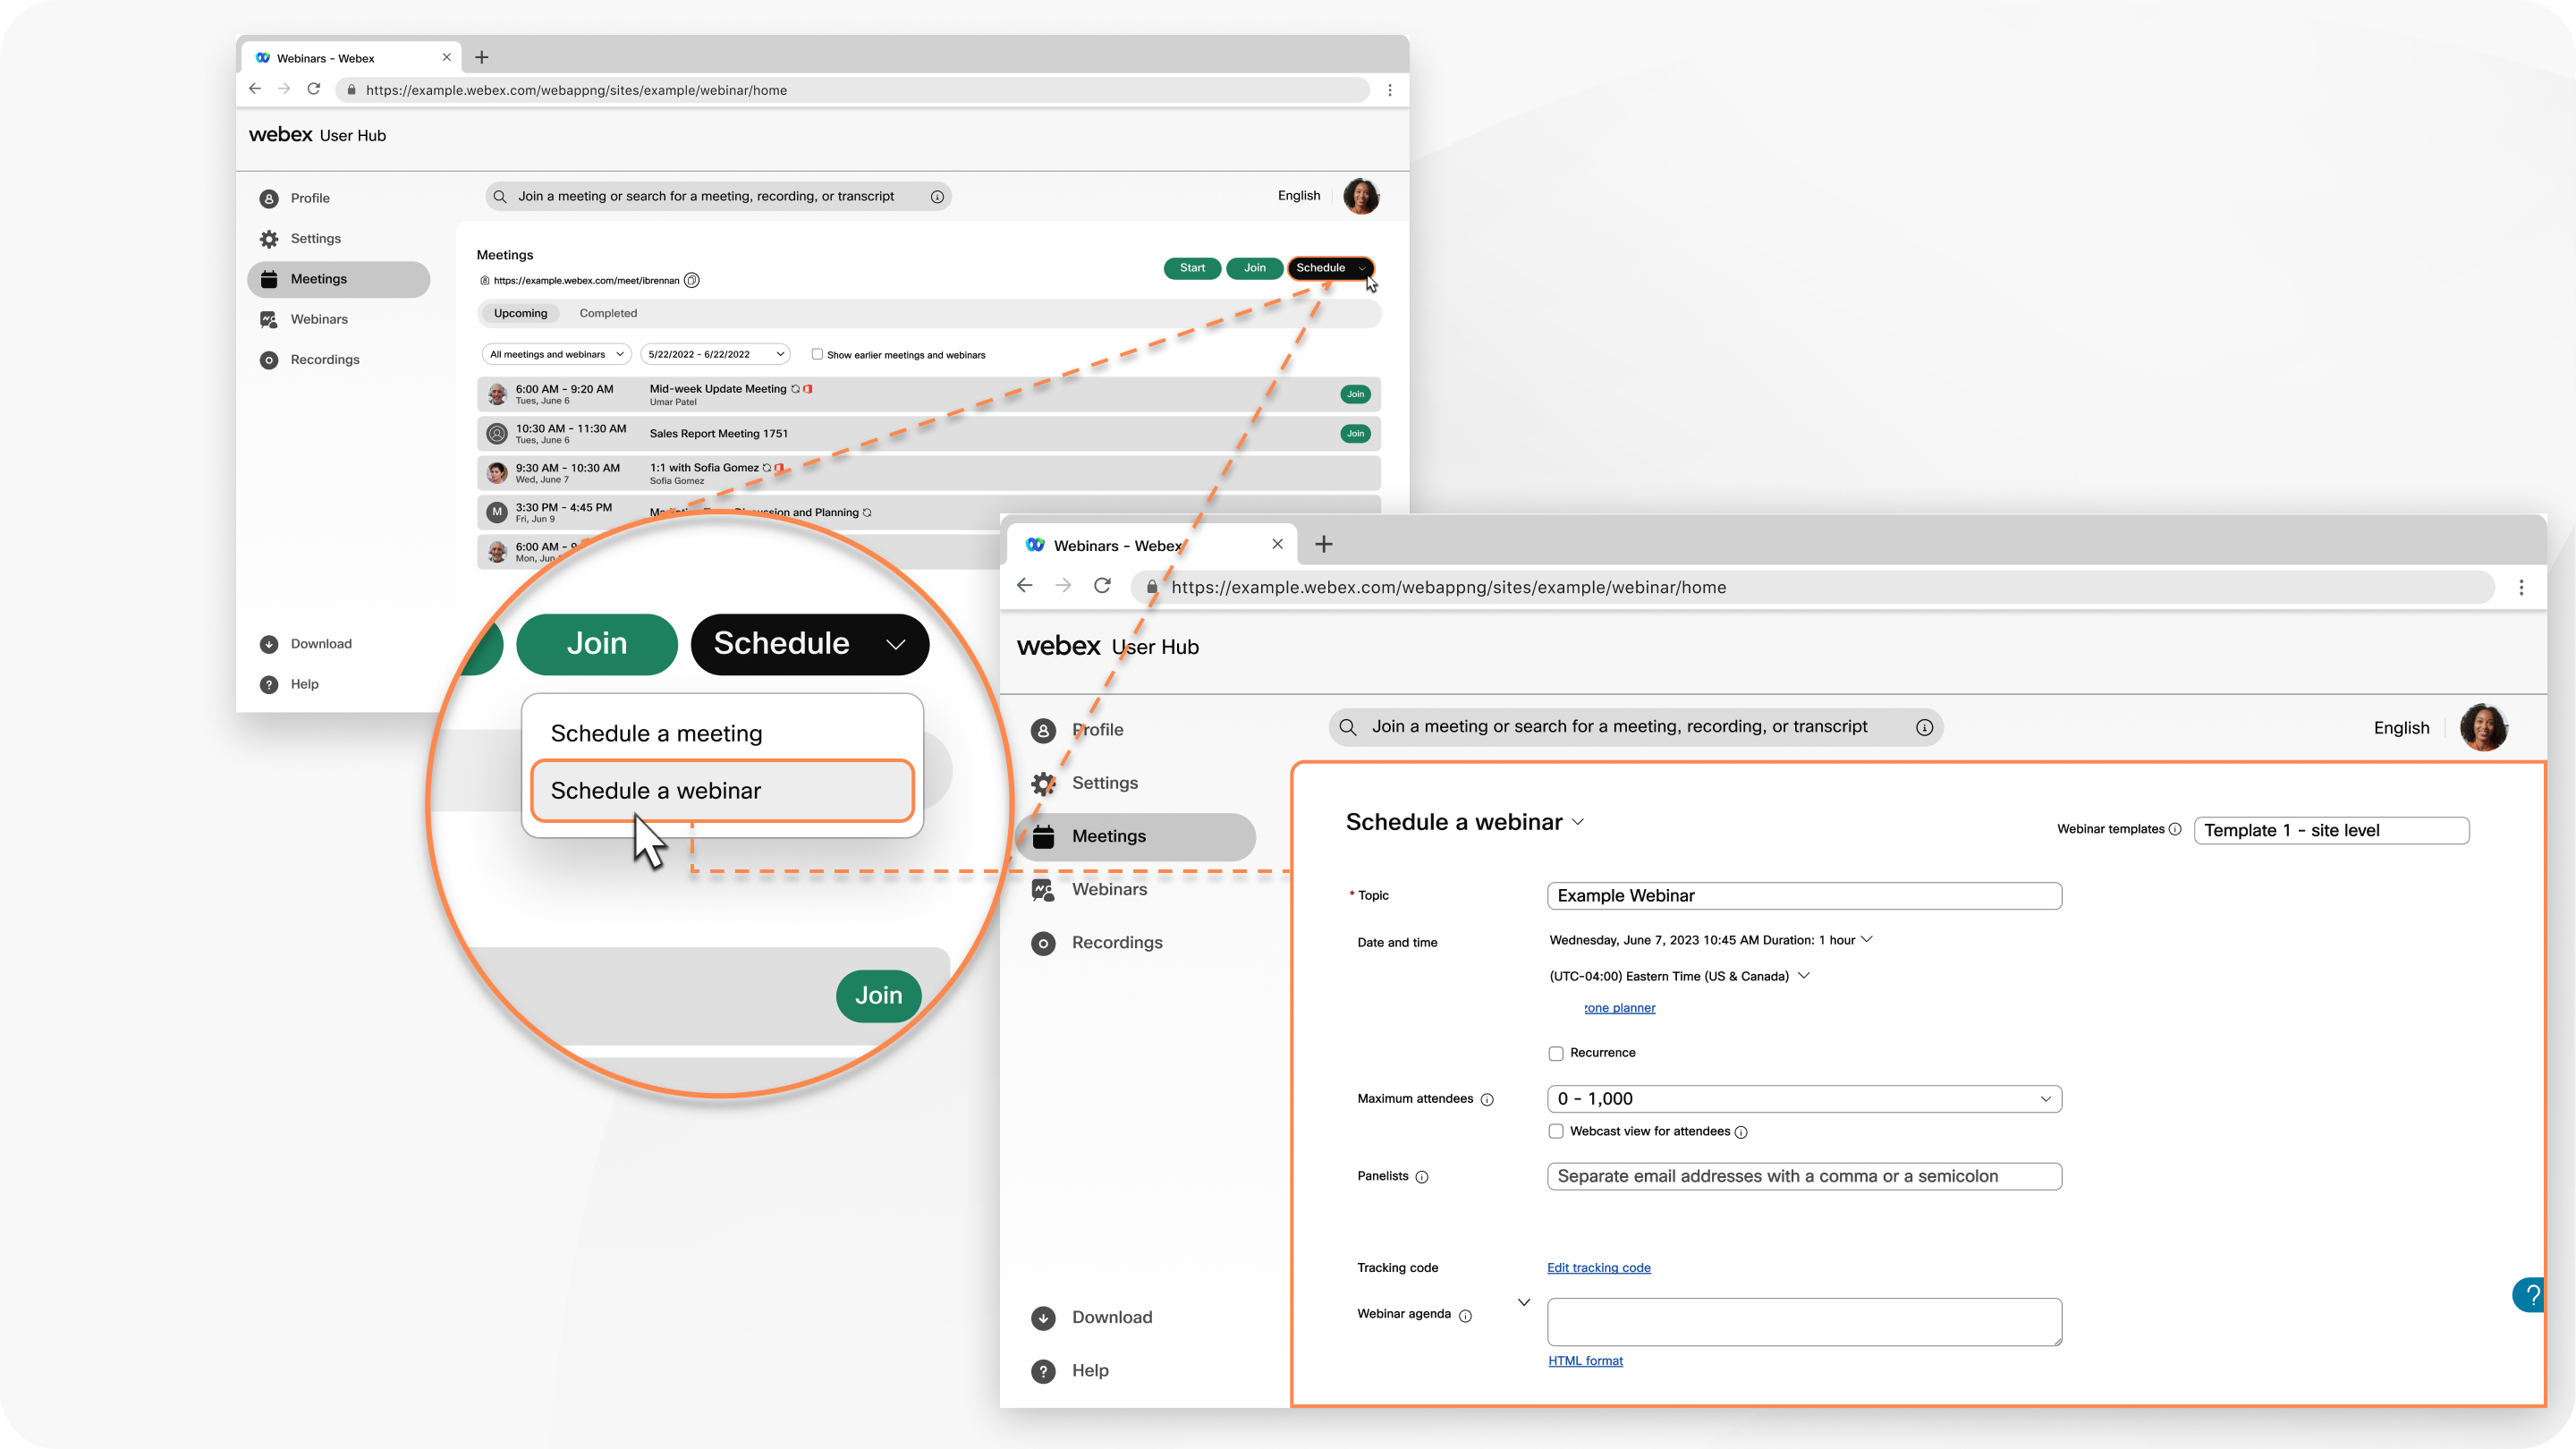
Počet lidí, které můžete pozvat na webinář , závisí na zakoupené licenci. Webináře mohou zahrnovat až 10,000 lidí. Schedule a webinar in webcast view for more than 10,000 attendees.

Webináře v zobrazení webového vysílání nejsou k dispozici pro Webex pro státní správu.

After you schedule a webinar, you get a confirmation email, and an email to forward to attendees.

1

Sign in to User Hub, click the Meetings tab, then click the Schedule drop-down menu and select Schedule a webinar.

2

(Optional) If you have any saved webinar templates, select one from the Webinar templates drop-down menu.

3

Přidej základy a poskytni následující informace:

  • Topic—Choose a topic that people recognize and get excited about.
  • Date and time—Indicate when the webinartakes place. Pokud zvete lidi z různých časových pásem, klikněte na Plánovač časových pásem, abyste našli čas, který nejlépe vyhovuje všem.
  • Maximum attendees—Choose the maximum number of attendees and whether you want a webinar in webcast view. See Compare experiences in Webex Webinars for more information.
  • Panelists—Enter the email addresses of the people you’re inviting to help you run your webinar. Ve svém webinářimůžete mít až 500 panelistů. Pokud mají účet na tomto webu, můžete vybrat vedle jejich jména, pokud chcete, aby byli spoluhostitelem.
  • Webinar agenda—Add any context or details that you want your attendees to have about the upcoming webinar.
4

V části Zabezpečení doplňte následující informace:

  • Webinar password—Use the provided password or enter your own. Účastníci musí zadat toto heslo, aby se mohli připojit k webináři .
  • Panelist password—Use the provided password or enter your own. Panelisté musí zadat toto heslo, aby byli součástí vašeho panelu webináře . If panelists don't enter this password when they join your webinar, they join as an attendee.

    If a panelist has an account on the same site where the webinar is hosted, they just have to sign in. If they don't have an account on the same site, a prompt appears to enter this panelist password.

    Check out Roles in Webex Webinars for information about the differences between the various roles.

  • Join before host—Allow panelists and attendees to join your webinar and panelists to connect their audio before the webinar starts.
  • Require account—If you want attendees to have a Webex account on this site to join the webinar, check this check box.

    Check Restrict webinar to invited attendees only if you want to restrict the webinar to invited attendees only. This turns off webinar registration options.

5

V části Možnosti připojení zvuku přidejte následující informace:

  • Typ zvukového připojení
    • Webex Audio-Vyberte, zda chcete podporovat možnosti volání, zpětného volání a zvuku počítače. Poté můžete také zahrnout bezplatná a globální telefonní čísla a nastavit vstupní a výstupní tóny, abyste slyšeli, když se někdo připojí nebo opustí webinář.
      When using Webex Audio with the Announce Name feature, panelists who select the Use computer for audio option can't record and announce their names
    • Použít pouze protokol VoIP - Omezuje všechny účastníky panelu na používání zvuku počítače.
    • Jiná telekonferenční služba - Umožňuje zadat informace o telekonferenci třetí strany.
    • Žádný-žádný zvuk.
  • Ztlumit panelistu
    • Allow the host and cohosts to unmute participants (moderated unmute mode)—Hosts and cohosts can unmute participants and SIP-based video devices directly without sending an unmute request.
    • Allow panelists to unmute themselves in the webinar—If you choose to mute panelists when they join, select this option to allow them to unmute themselves during the webinar.
      • Tuto možnost nevybírej, pokud chceš, aby pouze hostitel nebo spoluhostitel mohl vypnout ztlumení panelu.
    • Always mute panelists when they join the webinar—automatically mutes panelists when they join the webinar.
6

Klikněte na možnost Pokročilé pro přidání relace tréninku, povolení relací útěku, přidání tohoto webináře do existující série nebo nové série, kterou vytvoříte, zapnutí simultánní interpretace, vyžadování registrace, odesílání e-mailových upomínek a další.

7

Click Schedule to schedule your webinar.

When you schedule a webinar, attendees automatically receive email reminders using the default template. If you prefer to customize your email template and send reminders later, uncheck Automatically send email invitations to all participants after clicking Schedule, then follow the instructions in Customize email templates in Webex Webinars.

After you schedule the webinar, you can select it from your calendar and do one of the following:
8

After you schedule the webinar, you can click to download an .ics file, or add the webinar to your Google or Microsoft Office 365 Calendar.

9

You receive an email to forward to attendees to invite them to the webinar.

After you schedule your webinar, click Save as template to save these options as a template for future use.