schedule a webinar

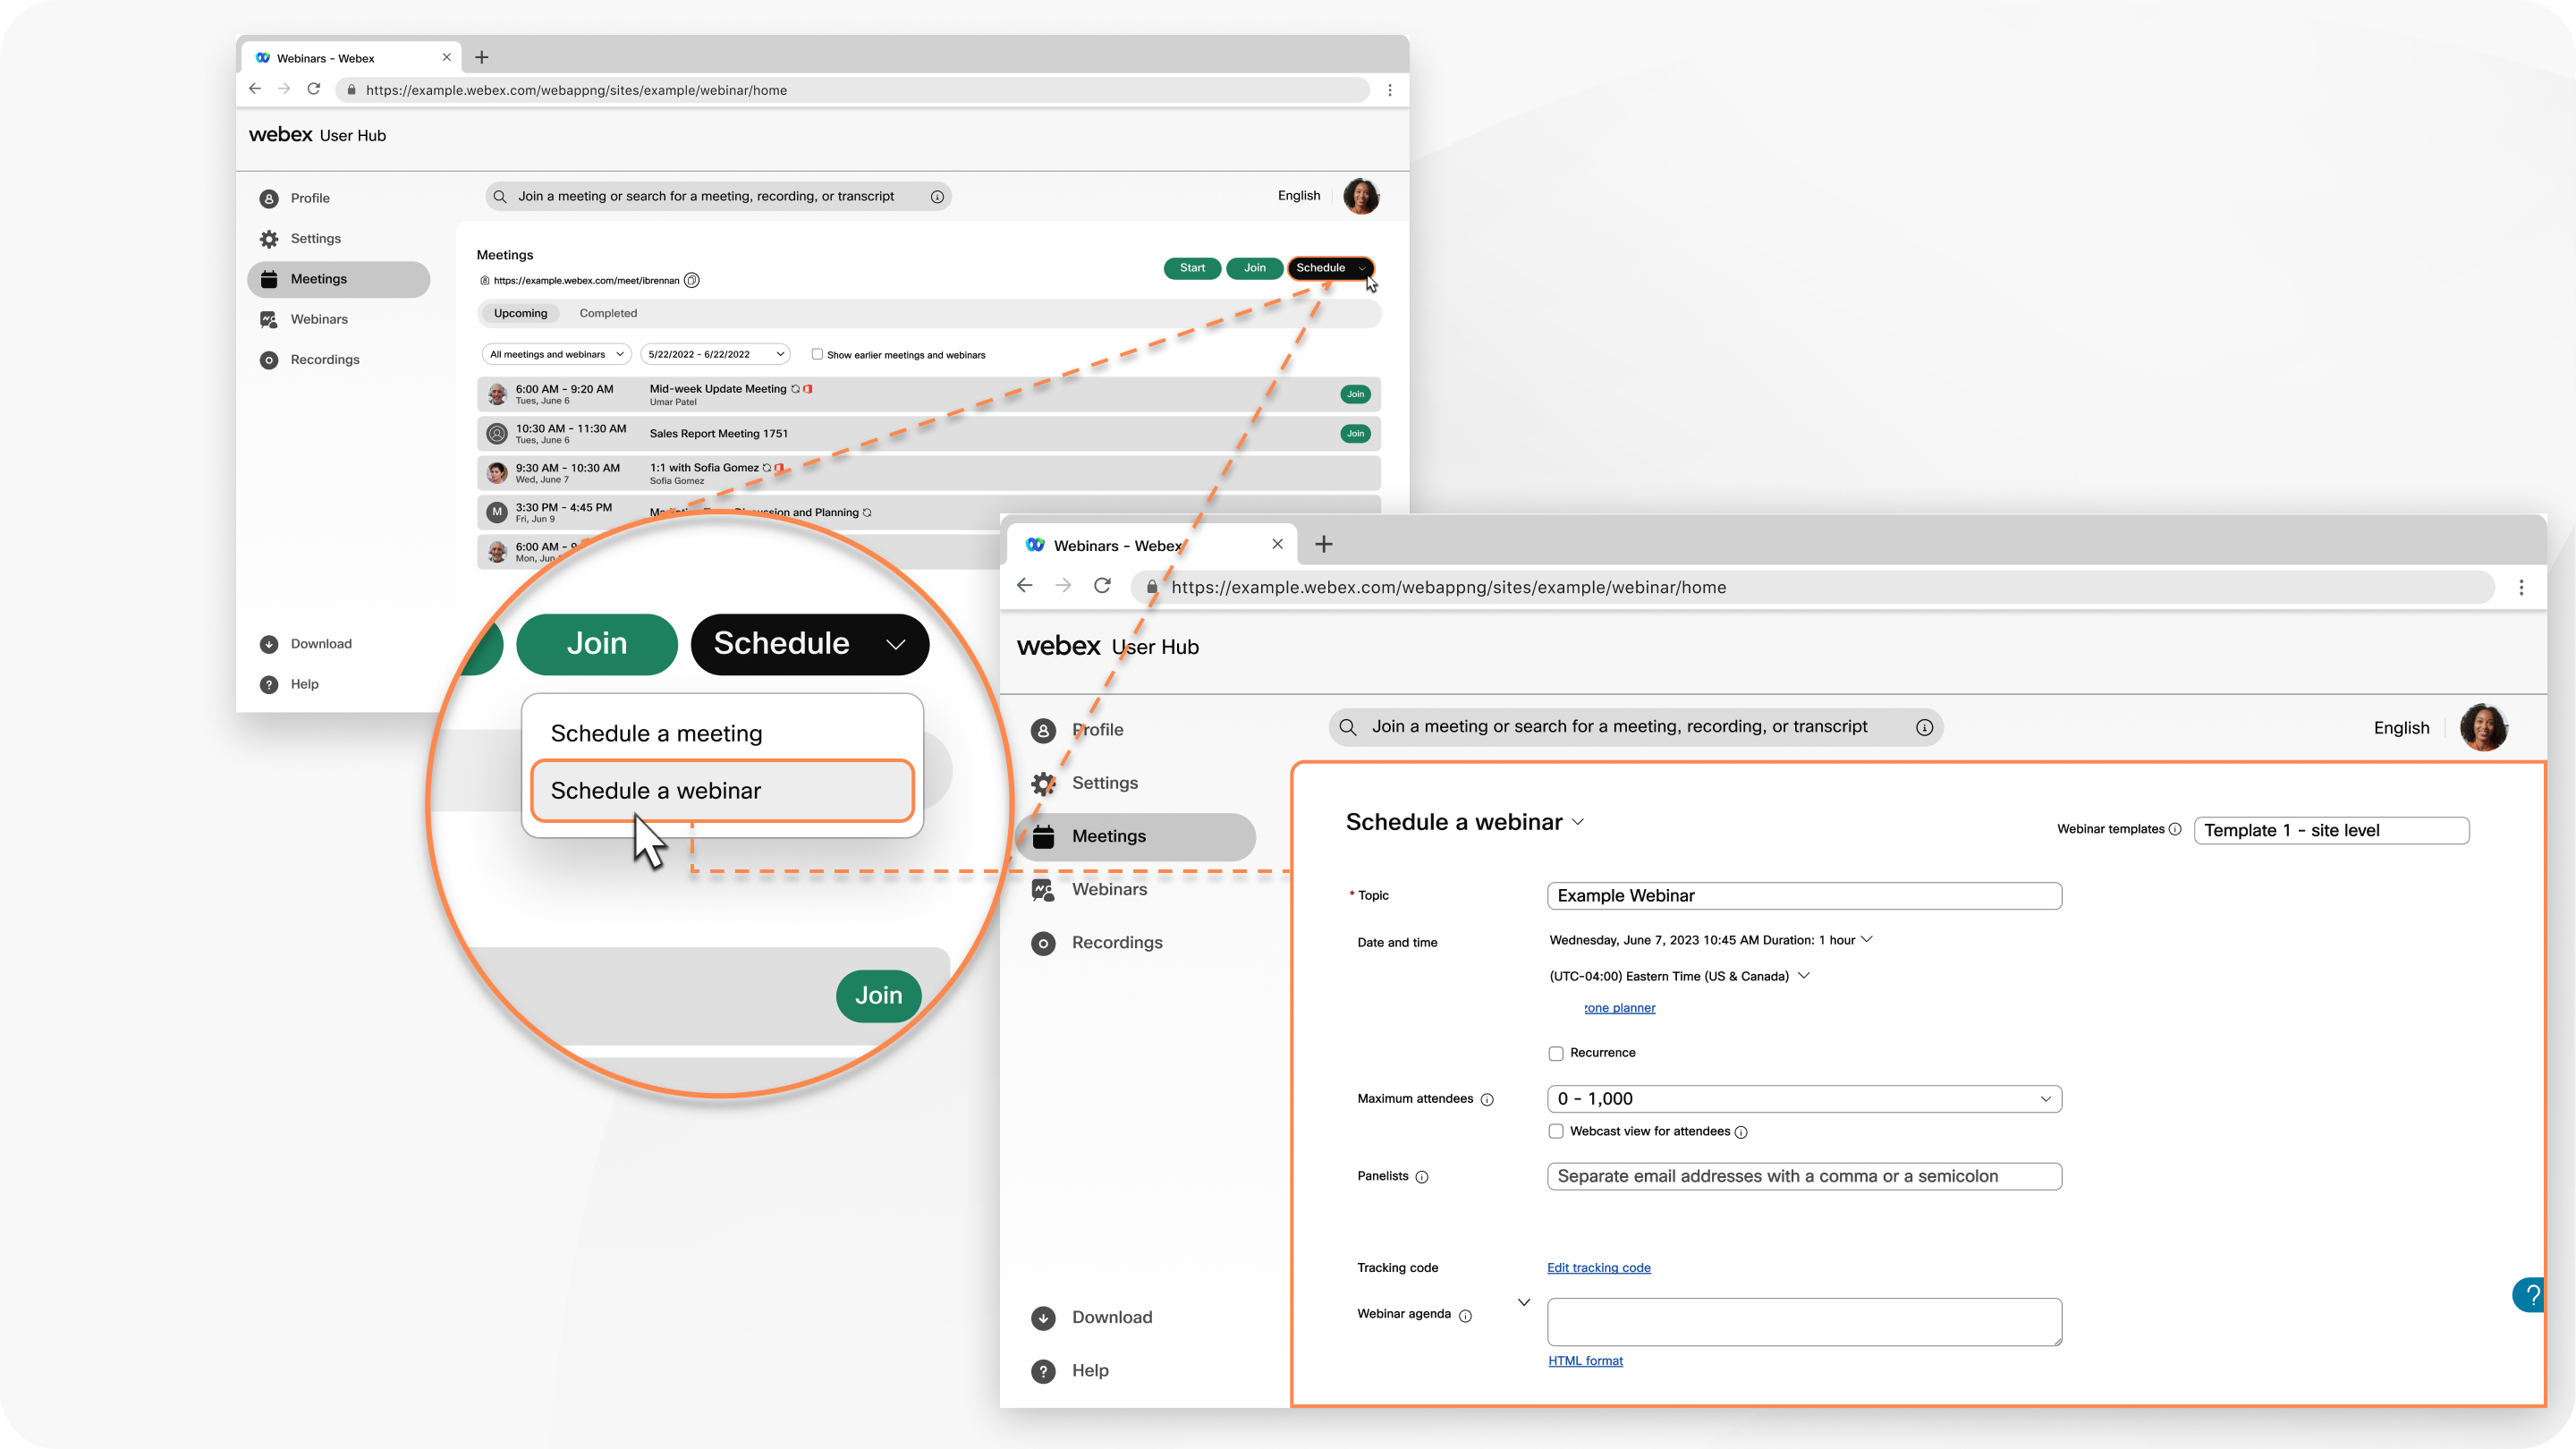
您可以邀请加入网络研讨会的人的数量取决于所购买的许可证。网络研讨会 最多包含 10,000 人。Schedule a webinar in webcast view for more than 10,000 attendees.

网络广播视图中的网络研讨会不适用于政府版 Webex。

After you schedule a webinar, you get a confirmation email, and an email to forward to attendees.

1

Sign in to User Hub, click the Meetings tab, then click the Schedule drop-down menu and select Schedule a webinar.

2

(Optional) If you have any saved webinar templates, select one from the Webinar templates drop-down menu.

3

通过提供以下信息来添加基本信息:

  • Topic—Choose a topic that people recognize and get excited about.
  • Date and time—Indicate when the webinartakes place. 如果您邀请不同时区的人,请单击时区计划程序,以便找到最适合所有人的时间。
  • Maximum attendees—Choose the maximum number of attendees and whether you want a webinar in webcast view. See Compare experiences in Webex Webinars for more information.
  • Panelists—Enter the email addresses of the people you’re inviting to help you run your webinar. 您最多可以有 500 名网络研讨会中的主讨论者。如果他们在此站点上拥有帐户,如果您希望 他们成为共同协调人,您可以在他们的姓名旁选择。
  • Webinar agenda—Add any context or details that you want your attendees to have about the upcoming webinar.
4

在安全性部分中,添加以下信息:

  • Webinar password—Use the provided password or enter your own. 与会者必须输入此密码才能加入网络研讨会。
  • Panelist password—Use the provided password or enter your own. 答疑者必须输入此密码,才能加入您的网络研讨会小组。If panelists don't enter this password when they join your webinar, they join as an attendee.

    If a panelist has an account on the same site where the webinar is hosted, they just have to sign in. If they don't have an account on the same site, a prompt appears to enter this panelist password.

    Check out Roles in Webex Webinars for information about the differences between the various roles.

  • Join before host—Allow panelists and attendees to join your webinar and panelists to connect their audio before the webinar starts.
  • Require account—If you want attendees to have a Webex account on this site to join the webinar, check this check box.

    Check Restrict webinar to invited attendees only if you want to restrict the webinar to invited attendees only. This turns off webinar registration options.

5

在音频 连接选项 部分中,添加以下信息:

  • 音频连接类型
    • Webex 音频 - 选择支持呼出、回呼和计算机音频选项。然后,您还可以加入免费号码和全球呼入号码,并设置有人加入或离开网络研讨会时听到的进入声音和退出声音。
      When using Webex Audio with the Announce Name feature, panelists who select the Use computer for audio option can't record and announce their names
    • 只能网络语音 - 限制所有面板的被调查者使用计算机音频。
    • 其他电话会议服务 - 允许您输入第三方电话会议信息。
    • 无 - 无音频。
  • 将与会者静音
    • Allow the host and cohosts to unmute participants (moderated unmute mode)—Hosts and cohosts can unmute participants and SIP-based video devices directly without sending an unmute request.
    • 允许与会者在网络研讨会中将自己取消静音 - 如果您选择在与会者加入时将其静音,则选择该选项以允许他们在网络研讨会期间将自己取消静音。
      • 如果您希望只有主持人或主持人能够将面板取消静音,请勿选择此选项。
    • Always mute panelists when they join the webinar—automatically mutes panelists when they join the webinar.
6

单击高级选项以添加演习会话、启用分组讨论、将此网络研讨会添加到现有系列会议或您创建的新系列中、开启同时解释、要求注册、发送电子邮件提醒等。

7

Click Schedule to schedule your webinar.

When you schedule a webinar, attendees automatically receive email reminders using the default template. If you prefer to customize your email template and send reminders later, uncheck Automatically send email invitations to all participants after clicking Schedule, then follow the instructions in Customize email templates in Webex Webinars.

After you schedule the webinar, you can select it from your calendar and do one of the following:
8

After you schedule the webinar, you can click to download an .ics file, or add the webinar to your Google or Microsoft Office 365 Calendar.

9

You receive an email to forward to attendees to invite them to the webinar.

After you schedule your webinar, click Save as template to save these options as a template for future use.