09 січня 2026 р. | 1417 переглядів | 0 — користувачі, які вважають цей матеріал корисним
Планування вебінарів Webex
Надіслати відгук?
Як організатор або співорганізатор, ви можете планувати вебінари. Вебінари є інтерактивними та дуже захопливими; якщо ваш захід вимагає простішого досвіду для учасників, вебінари у режимі вебтрансляції – це те, що вам потрібно. Швидко заплануйте їх за допомогою базових налаштувань або приділіть трохи більше часу їх налаштуванню за допомогою розширених параметрів, щоб адаптувати вебінари до ваших потреб.
Кількість людей, яких ви можете запросити на вебінар, залежить від придбаної ліцензії. Вебінари можуть включати до 10 000 осіб. Заплануйте вебінар у режимі вебтрансляції для понад 10 000 учасників.
Вебінари у режимі веб-трансляції недоступні для Webex for Government.
Після планування вебінару ви отримаєте електронний лист із підтвердженням та електронний лист для пересилання учасникам.
1
Увійдіть до Центру користувачів, натисніть вкладку Зустрічі, потім натисніть спадне меню Розклад та виберіть Запланувати вебінар.
2
(Необов’язково) Якщо у вас є збережені шаблони вебінарів, виберіть один із них у розкривному меню Шаблони вебінарів.
3
Додайте основні відомості, надавши таку інформацію:
Тема— Виберіть тему, яку люди впізнають і яка їх цікавить.
Дата та час— Вкажіть, коли відбудеться вебінар. Якщо ви запрошуєте користувачів із різних часових поясів, клацніть планувальник часових поясів, щоб знайти час, який найкраще підходить для всіх.
Максимальна кількість учасників— Виберіть максимальну кількість учасників і чи хочете ви вебінар у режимі вебтрансляції. Див. Порівняння досвіду на вебінарах Webex для отримання додаткової інформації.
Учасники дискусії— Введіть адреси електронної пошти людей, яких ви запрошуєте допомогти вам провести вебінар. У вашому вебінарі може бути до 500 учасників панелі. Якщо у них є обліковий запис на цьому сайті, ви можете вибрати поруч з їх ім'ям, якщо ви хочете, щоб вони були співведучими.
Максимальна кількість учасників вебінарів на платформі для зустрічей Webex Suite обмежена 100.
Порядок денний вебінару— Додайте будь-який контекст або деталі щодо майбутнього вебінару, які ви хочете повідомити своїм учасникам.
Поле «Порядок денний вебінару» підтримує максимум 2500 символів. Плануючи вебінар, переконайтеся, що ваш порядок денний не перевищує цього ліміту.
4
У розділі Безпека додайте таку інформацію:
Пароль вебінару— Використовуйте наданий пароль або введіть свій власний. Учасники повинні ввести цей пароль, щоб приєднатися до вашого вебінару.
Пароль учасника панелі— Використовуйте наданий пароль або введіть свій власний. Учасники панелі повинні ввести цей пароль, щоб стати частиною вашої панелі вебінару. Якщо учасники панелі не введуть цей пароль під час приєднання до вашого вебінару, вони приєднаються як учасники.
Якщо учасник панелі має обліковий запис на тому ж сайті, де проводиться вебінар, він повинен увійти в систему. Якщо у них немає облікового запису на тому ж сайті, з’явиться запит на введення пароля цього учасника панелі.
Приєднатися до організатора— Дозвольте учасникам дискусії та учасникам приєднатися до вашого вебінару, а учасникам дискусії – підключити аудіо до початку вебінару.
Вимагати облікового запису— Якщо ви хочете, щоб учасники мали обліковий запис Webex на цьому сайті для приєднання до вебінару, поставте прапорець у цьому полі.
Позначте Обмежити вебінар лише запрошеними учасниками, якщо ви хочете обмежити доступ до вебінару лише запрошеними учасниками. Це вимикає параметри реєстрації на вебінар .
5
У розділі Параметри підключення аудіо додайте такі відомості:
Тип аудіопідключення
Аудіо Webex — виберіть підтримку опцій аудіо для підключення до виклику, зворотного виклику та комп’ютера. Ви також можете додати безкоштовні та міжнародні номери для підключення, а також встановити звукові сигнали входу та виходу, щоб чути, коли хтось приєднується до вебінару або виходить з нього.
Під час використання аудіо Webex з функцією Оголосити ім'я учасники панелі, які вибрали опцію Використовувати комп'ютер для аудіо, не можуть записувати та оголошувати свої імена.
Використовуйте лише VoIP — обмежує всіх учасників дискусії використанням аудіопристрою комп'ютера.
Інша послуга телеконференції — дозволяє вводити інформацію про телеконференцію третьої сторони.
Немає — немає аудіо.
Німий учасник дискусії
Дозволити організатору та співорганізаторам вмикати звук учасників (модерований режим увімкнення звуку) – організатори та співорганізатори можуть безпосередньо вмикати звук учасників та відеопристроїв на базі SIP, не надсилаючи запит на це.
Дозволити учасникам панелі вмикати звук під час вебінару — якщо ви вирішили вимикати звук учасників панелі під час їх приєднання, виберіть цей параметр, щоб дозволити їм вмикати звук під час вебінару.
Не вибирайте цей варіант, якщо ви хочете, щоб лише господар або співгосподар мали можливість увімкнути звук для учасників панелі.
Завжди вимикати звук учасників панелі, коли вони приєднуються до вебінару — автоматично вимикає звук учасників панелі, коли вони приєднуються до вебінару.
Коли ви плануєте вебінар, учасники автоматично отримують нагадування електронною поштою, використовуючи шаблон за замовчуванням. Якщо ви бажаєте налаштувати шаблон електронної пошти та надсилати нагадування пізніше, зніміть прапорець Автоматично надсилати запрошення електронною поштою всім учасникам після натискання кнопки «Запланувати» , а потім виконайте інструкції в розділі Налаштування шаблонів електронних листів у вебінарах Webex.
Після планування вебінару ви можете вибрати його з календаря та виконати одну з наступних дій:

 Надіслати відгук?
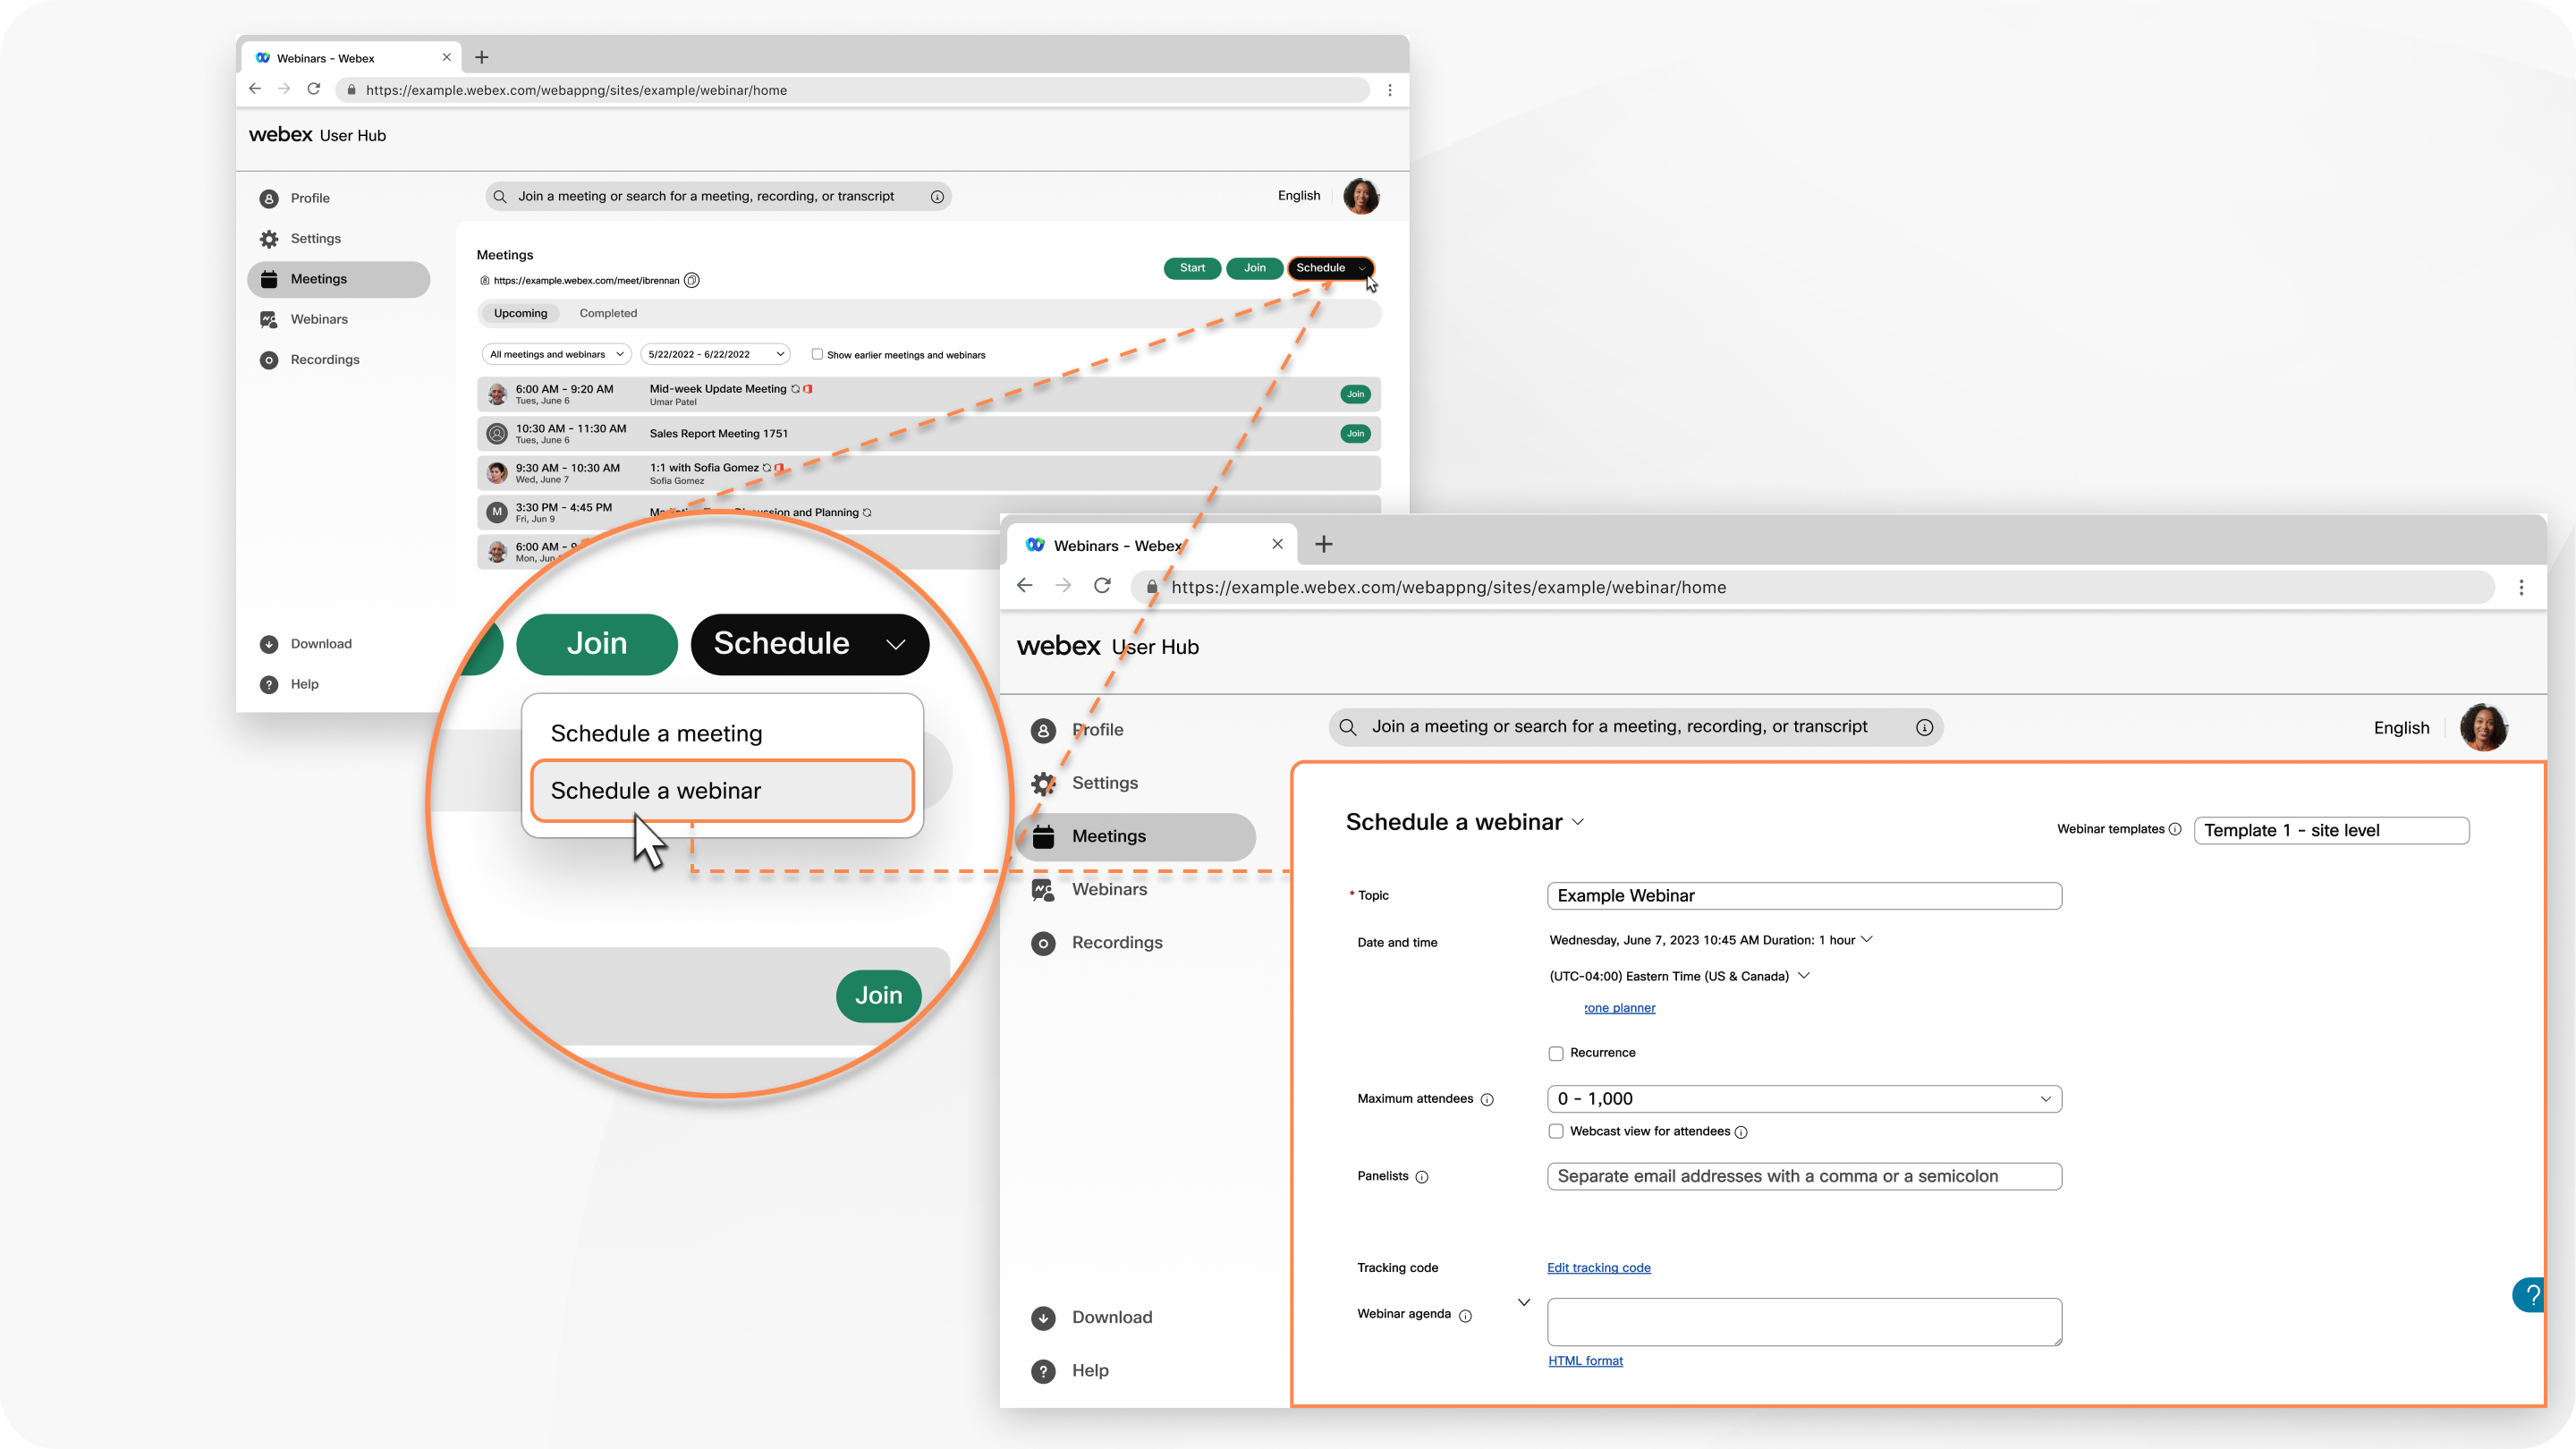
 поруч з їх ім'ям, якщо ви хочете, щоб вони були співведучими.
  , щоб завантажити файл .ics, або додати вебінар до свого календаря Google або Microsoft Office 365.


